
When I signed on to be a Baby Lock Ambassador, I was looking to upgrade my broken serger. While doing my research I saw the incredible range of embroidery and sewing machines they had. I had another brand of embroidery machine and some top of the line digitizing software. The software was very detailed, explaining a full range of digitizing skills and techniques. Learning to use it had a steep learning curve and I was never pleased with the results. They were serving me well, but I was looking for a change.
Enter the Baby Lock Altair with IQ Designer. This technology allows you to create your own embroidery designs with ease. It allows you to take a photo on your phone and wirelessly transmit it to the sewing machine through the app. It takes line drawings and illustrations and digitizes with colors and stitches of your choosing. No extra software is required!
As you know, I have spent a significant part of the year working on illustrations for my hand embroidery book Represent! Embroidery.

I love the depth and texture that is achieved with hand embroidery. It is a wonderfully meditative process that I enjoy. That being said, I was excited and intrigued with the prospect of converting my illustrations into digitally embroidered pieces. The Find Yourself journal cover is a word search puzzle project from my book. The little letters and satin stitch border was very satisfying yet, time-consuming to stitch by hand. I was curious to see what the Altair could do.

I like to jump in the deep end, so I started with a big project. I chose a puzzle from the book and a premade black canvas tote like the kind I will be using for my QuiltCon Class in February. I opened the side seams and mounted the bag in the hoop with a medium tear-away stabilizer. I took a photo of the illustration from the book and uploaded it wirelessly to my Altair with the IQ designer app. (Do not use images that are not yours and are protected by copyright.) Following a few on-screen prompts I chose the colors and stitch type that I wanted. I was able to remove any elements I did not want stitched out. I love that it has preset embroidery floss brands with their color codes. It allowed me to identify and coordinate the final output based on what was available in my stash.

Once I was satisfied with the design, I sent it to the next screen for embroidery. The screen tells me the order of the colors and the length of time it would take to stitch as well as the total stitches in the project. The Altair cuts the jump stitches between color changes and buries the threads on the underside of the fabric.

The Altair has a secondary spool pin, motor and bobbin winder. This means that while the embroidery is stitching, I can wind a new bobbin without interrupting the stitching process. This is really efficient when stitching a large project like this one.

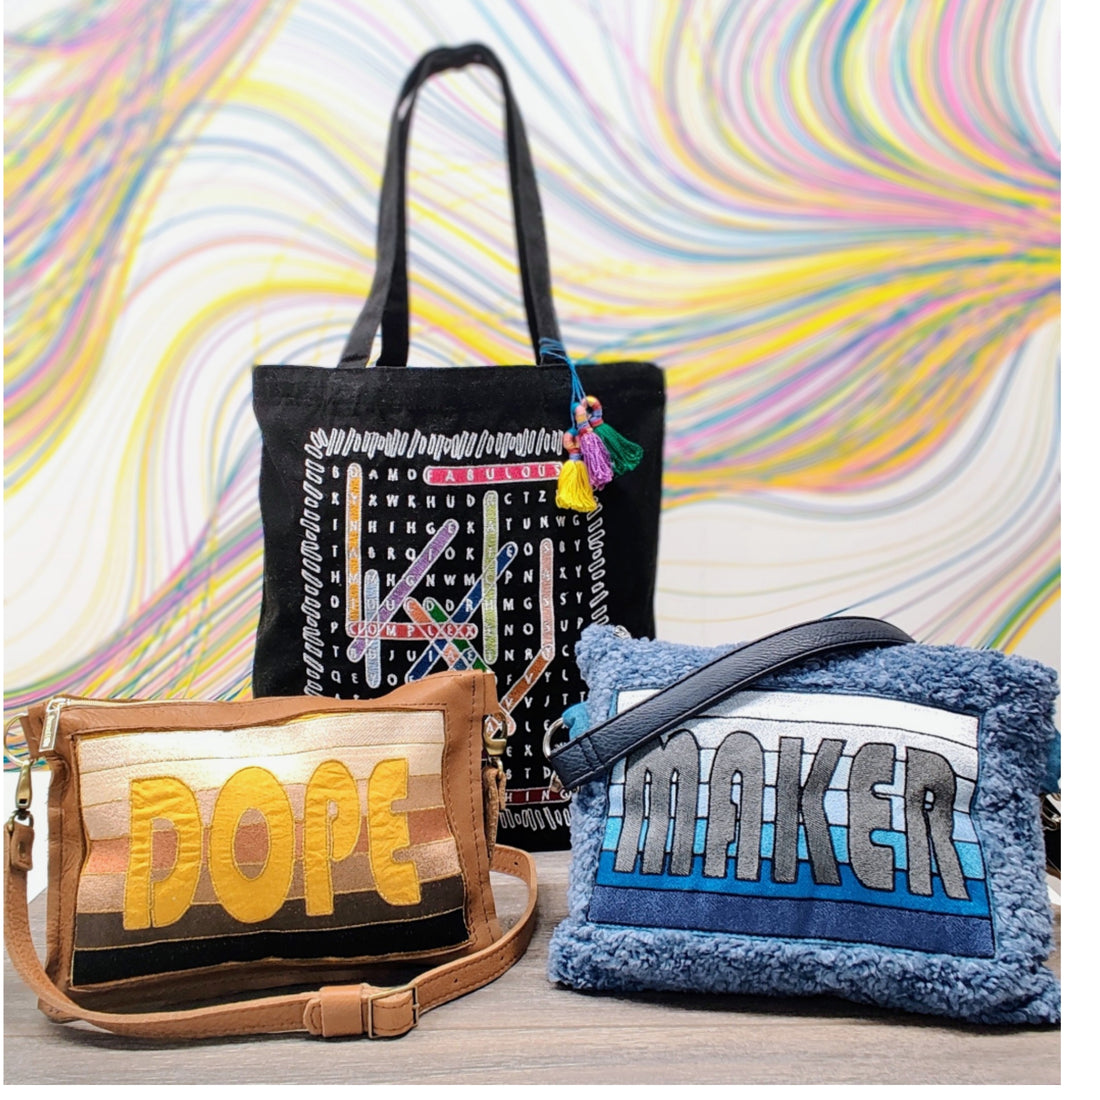
This first project stitched up beautifully. I used my Accolade serger to sew the side seams closed and added some decorative tassels. I am so pleased with the result, I immediately wanted to try again and again.

Next, I uploaded the DOPE and MAKER images from the zipper pouch in the book.

I followed the steps as before and this time for the DOPE, I used metallic threads as an accent. If you have embroidered with metallic threads, they can sometimes break, tangle or bunch which stitching. I was prepared to rethread, use thread nets, or pass the thread through a packing peanut, to get a good result. These are tricks I have had to use on my other machine. With the Altair, I did not have to do any of that; it just stitched normally with no problems.

The Altair has a function called under-sewing. This lays a foundation of stitches beneath the design before the top layer. This makes the stitches denser and covers the fabric uniformly. I did not use this feature on the DOPE version. I wanted this version to feature negative space so I did not have the text filled in. Because of that visibility, I thought this would be a good test to see what not using the under-sewing would look like. You can see some of the backing fabric show through. For this project, I am not bothered by that and it is good to know what to expect.

I used the completed panel to make a slightly modified version on the pattern in the book. I sewed the leather with exposed seams and added D-rings and an adjusted crossbody strap.

On the MAKER pouch, I chose to fill in the text and I turned on the under-sewing. I like the look of the denser stitches, it did however, increase the stitching time. I will balance the desired look with the time in the future.

I am so impressed with the ease of this process. The steps are easy to follow and are fairly intuitive. I cannot tell you the hours I have spent trying to learn digitizing over the years. I have bought designs from others that was close to what I wanted, but never the prefect thing. After watching a couple of the included IQ Designer classes, I was stitching exactly what I wanted with great results!

I love the the meditative process of hand sewing and embroidery. I love that it looks like someone made every stitch. I love seeing the "hand of the maker". I love the texture different fibers can bring and the dimension it adds. That being said, I also love the uniformity machine embroidery gives a project. I love the fact that projects can be replicated and look the same with each rendition. I am super excited to continue to explore this machine and what it can do.

Happy sewing,
Bianca